Add FusionAuth as an identity provider
Use FusionAuth to give your organization users single sign-on (SSO) access to Aiven.
Prerequisite steps in Aiven Console
Add FusionAuth as an identity provider in the Console.
Configure SAML on FusionAuth
The setup on FusionAuth has three parts:
- create an API key
- generate a custom RSA certificate
- create an application
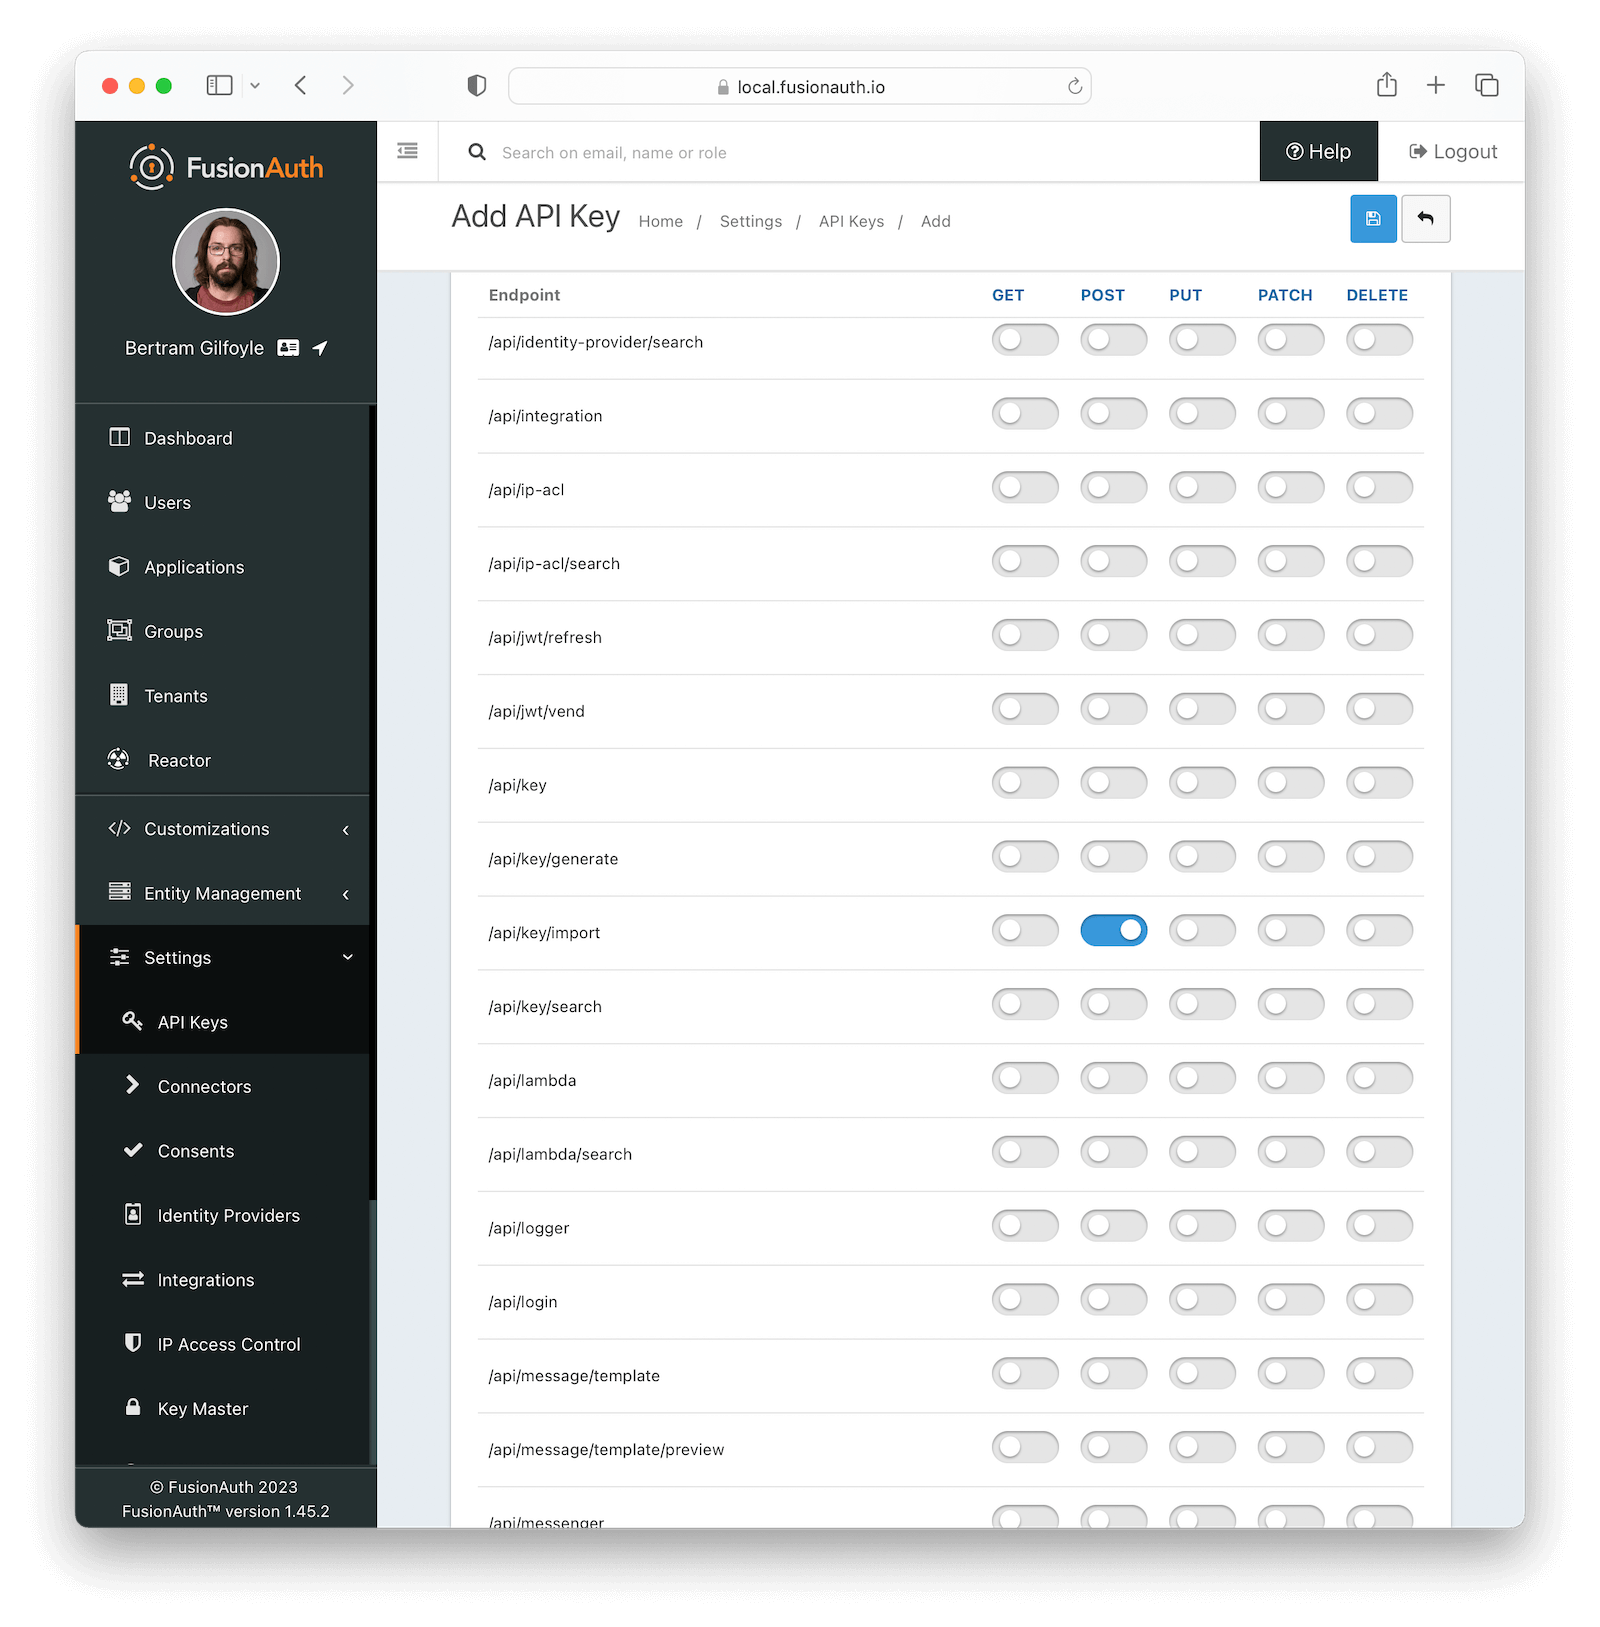
Create an API Key in your FusionAuth instance:
-
In FusionAuth, go to Settings > API Keys.
-
Click the Add icon.
-
Enter a description for the key. Example:
Certificate generator. -
In the Endpoints list, find
/api/key/import. -
Toggle on POST.
-
Click the Save icon.
-
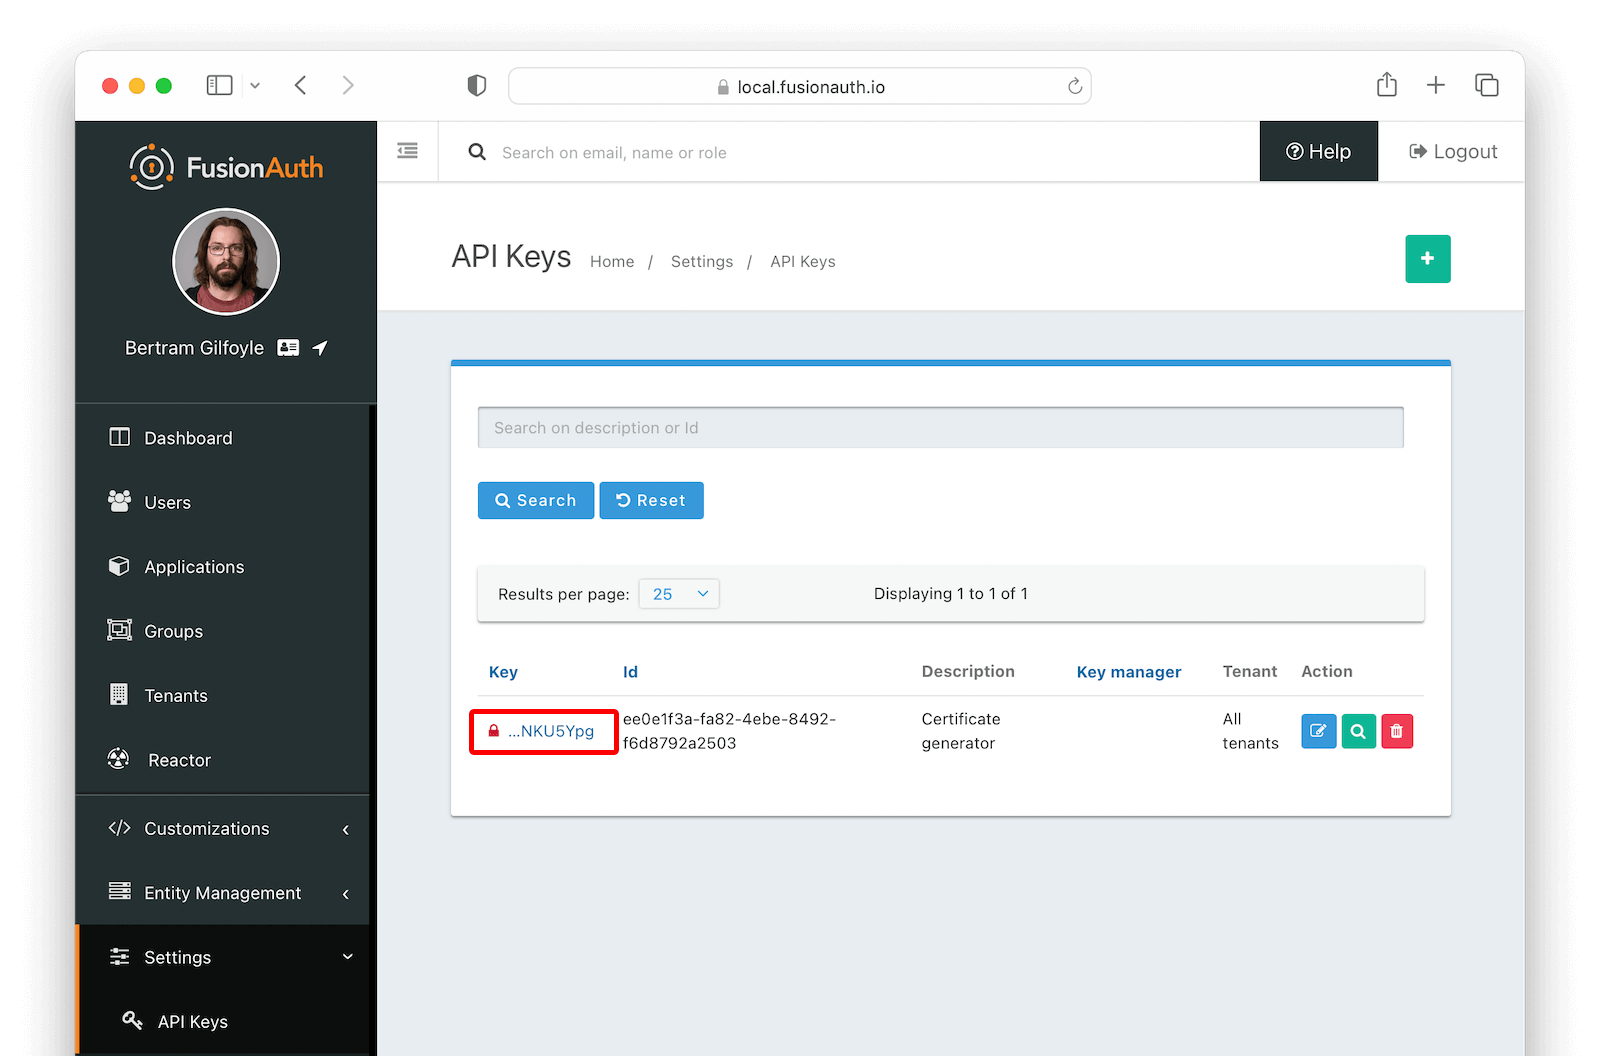
On the API Keys page, find your new key and click the value in the Key column.
-
Copy the whole key. You'll use this for the script.
-
Clone the FusionAuth example scripts GitHub repository.
git clone git@github.com:FusionAuth/fusionauth-example-scripts.git
cd fusionauth-example-scripts/v3-certificate -
Run the
generate-certificatescript../generate-certificate -
Give the key a meaningful name (for example, "Aiven key").
-
Copy the generated certificate that the script creates. You now have a certificate in the Key Master in your FusionAuth instance.
Create an application in your FusionAuth instance:
-
In Applications, click the Add icon.
-
Enter a name for the application (for example, "Aiven").
-
On the SAML tab, and toggle on the Enabled switch.
-
Paste the Metadata URL and ACS URL you copied from the Aiven Console to the Issuer and Authorized redirect URLs fields in your FusionAuth application, respectively.
Aiven FusionAuth Metadata URL Issuer ACS URL Authorized redirect URLs -
In the Authentication response section, change the Signing key to the API key you created.
-
Click the Save icon to save your application.
-
On the Applications page, click the magnifying glass.
-
In the SAML v2 Integration details section, copy the Entity Id and Login URL.
Finish the configuration in Aiven
Go back to the Aiven Console to configure the IdP and complete the setup.